Sunday 29 October 2017

FS560 - Merry Christmas


Congratulations to this week's Splitcoaststampers Featured Stamper, Jennie (aka CraftyJennie). I chose this card as my inspiration:


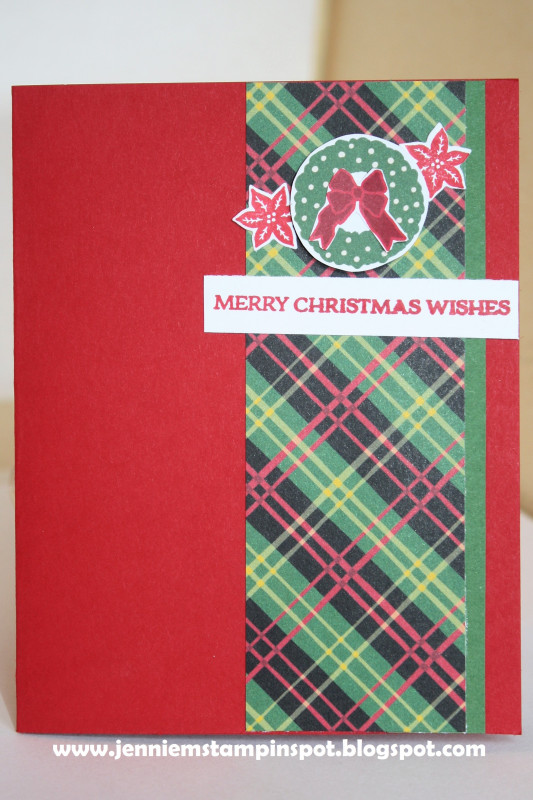
I focused on Jennie's:
-festive plaid
-Christmas greenery with red accents

I changed:
-more white
-wreath to tree
-position of focal image and sentiment

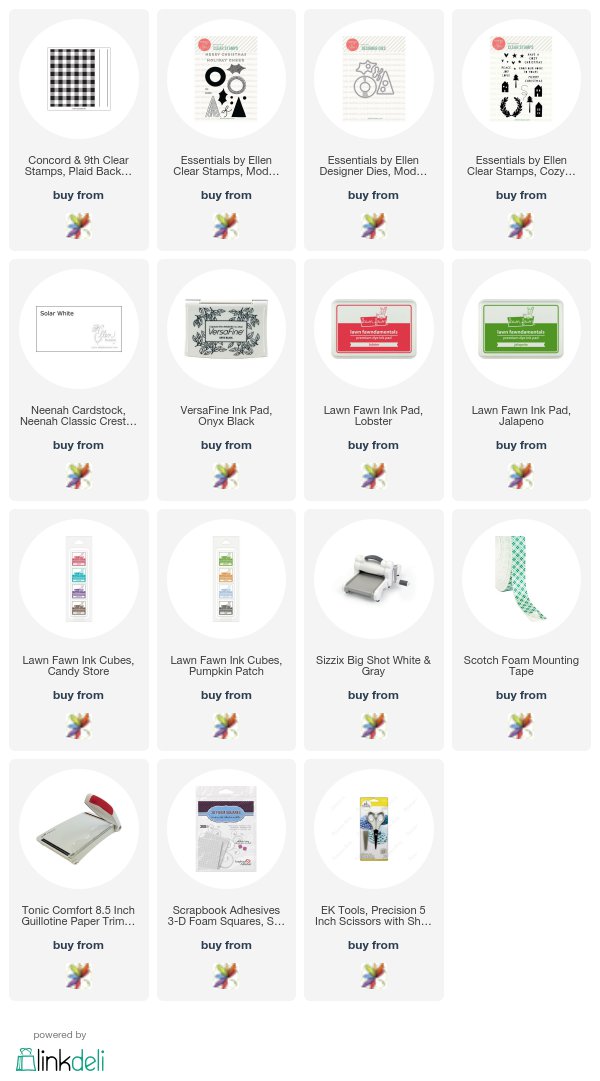
This Concord & 9th plaid background set is so fun! You can just use the big background stamp, to get a gingham look, or you can stamp the thin stripes as well to add colour and interest. I thought it would be fun to mask the stamp and just stamp a plaid border on the inside of the card. I shortened the front of the card so that the plaid is visible. The card back is 4.25x5.5 and the front is about 4.25x4.25.

I finished the card with the tree and ornaments from Modern Christmas and Cozy Christmas from Ellen Hutson, stamped in the same red and green that I used on the plaid background. Like yesterday, I used my MISTI to stamp the tree several times to ensure good saturated coverage.


I used:


Saturday 28 October 2017

Pin-Sights - Merry Christmas


Here's a fun take on the current Pin-Sights Challenge at Ellen Hutson's CLASSroom blog.

Pin-Sights Color Trend October 2017

I focused on the circle-tree and the bright colours.

I was also inspired by recent cards by Laura Bassen (man, the things that woman can do with circles!!) and Kristina Werner (modern trees with bold colours) and also just by the shape of this fun wreath in the new Modern Christmas set. Now that I look at it again, I think it looks like billiard balls! lol!

I set the stamp up on my MISTI so that I could re-stamp to get good saturation of my colours. I also made sure to really, REALLY clean my stamp in between impressions, using Ultra Clean, to ensure clean, clear colours.


I used:


Friday 27 October 2017

Happy Birthday Wendy!


Today is a very special day! Our friend and fearless leader, Wendy (owner of SugarPea Designs) is having a birthday and the DT got together and decided to have a little blog-hop birthday party to celebrate! The list of blogs is further down the post.

Some of you commented about all the masking on my penguin card last week, so I made a quick video to show you just how easy it really is, especially if you follow these tips:

1) choose one image that you want to repeat  (I cheated a bit here by putting the girl in the middle of the herd of cows)
2) cut several masks at a time (I usually do 4). This gives you flexibility in placement and allows you to move quickly
3) limit colours and colour in 'assembly line' style - colour all their heads, add the shading layer, then blend, etc

Here's a quick video - you will see that for me, the toughest thing was getting the masks apart after I cut them from full-sticky sticky notes!


I used:


Thursday 26 October 2017

AJVD/MCV87 - Peace on Earth


This is my card for this week's A Jillian Vance Design blog post and also for Muse: ChristmasVisions, inspired by Elizabeth's second card:


I focused on Elizabeth's:
- dark pine branches on the left
- background with an inky technique
-sparkly embellishments

I used:


Tuesday 24 October 2017

Muse 239 - Tis the Season


Here's my card for this week's Muse Challenge, where Guest Muse Stephanie gave us a luscious fall inspiration:


I focused on Stephanie's:
-blended background
-overstamping

I changed the season and colours and I limited the blending to leave some white space. 

This Poinsettia Greetings set is new at A Jillian Vance Design - it's classic and artsy at the same time and there are so many ways to use it (get ready!)

I love how rich these two reds are - I never thought I would like Aged Mahogany Distress Ink, but it makes the Candied Apple glow here, and it was the perfect autumn red last week, when I blended a leaf.


I used:


Sunday 22 October 2017

FS559 - Love You


Congratulations to this week's Splitcoaststampers' Featured Stamper, Jeanette (aka Forest Ranger). I chose this card as my inspiration:


I focused on Jeanette's:
-pastel rainbow with black
-floral theme
-general layout

I changed:
-white background and coloured flowers
-inlaid die cut for sentiment
-no ink blending

I started by stamping and masking my flowers and leaves. I chose a full rainbow of pastel Copics, but after 4, decided I liked the look of some white on the flowers. I then inlaid the black love into the white panel and stamped 'you'. Some stickles on the white areas of the petals for sparkle.

I used:


Saturday 21 October 2017

MCV87 - Snow


I've got 2 cards for the current Muse: ChristmasVision challenges. Our Guest Muse, Elizabeth provided 2 very different cards as inspiration but my two cards are both inspired by her first one:


I focused on Elizabeth's:
-snow theme
-sparkle
-colour

I used:


Friday 20 October 2017

SugarPea Designs Holiday Release Week Sweet Peeks Day 5


Good morning! It's the final day of SugarPea Designs' Holiday Release Sweet Peeks - tonight's the night that all these fun, festive products will be available!

Today we've got a really fun little tangled-up penguin and a Christmas tag set with matching dies.

On my first tag I combined the sweet penguin stamp with the tag dies. The sentiments in this tag set are hilarious and some of them will work all through the year.

My second tag is a little more traditional. I stamped the tree stamp with dark green ink then masked one of the trees and stamped again in lighter green ink, to create my little forest.

You may notice that the Santa stamp has two reindeer. This stamp is really easy to mask and add more reindeer, like I did on my Off the Charts card on Tuesday.

Today is your last chance to win, so be sure to get the details from the SugarPea blog.


No automatic alt text available.


No automatic alt text available.

Thursday 19 October 2017

SugarPea Designs Release Week Sweet Peeks Day 4


Welcome to Day 4 of SugarPea Designs' Holiday Release Sweet Peeks!


 These new products will be available for sale at 6 pm on Friday.

Today, we've got a super-sweet holiday treat stamp set with matching dies. When I saw the 'Oh Christmas Treat' sentiment, I knew I wanted to build a marshmallow Christmas tree. I masked a triangle on my focal panel and filled it in with the marshmallow stamps, starting with the largest and then filling in spaces with the smaller ones. I coloured everything with copics and backed it onto some of our previously released Happy Holidays patterned paper.


No automatic alt text available.


AJVD - Falling for You

Good morning!

I'm on the A Jillian Vance Design Blog this morning with tips for making masculine cards!

Wednesday 18 October 2017

Muse 238 - If the Hat Fits....


Here's my card for this week's Muse Challenge, where Kim brought us a sweet Halloween Inspiration:


I focused on Kim's:
-Hallowe'en theme
-Colours (black, orange, yellow and white)
-graphic black stripes

I created a very (VERY) simple watercolour wash background with Zig Art & Graphic Twin Tip markers on Bristol. The markers blend really easily on this smooth paper with just a bit of water.


I used:


SugarPea Designs Holiday Release Week Sweet Peeks Day 3

Welcome to Day 3 of SugarPea Designs' Holiday Release Week Sweet Peeks!

Today we're introducing Flurry of Warm Wishes and Pinecone Greetings.

To make my pine cones, I inked up the solid stamp with Rusty Hinge and Vintage Photo before spritzing with water. This makes each pine cone completely unique and adds a ton of texture. Once my panel was completely dry, I stamped the layering stamp on top using a very dark brown ink.  I stamped my sentiment and blended Tea Dye distress ink and added Diamond Stickles down the two edges of the panel. A pop of red gives this rustic card a festive feel.


I love snowflakes and I this set has some of my all time favourites! They are delicate and so pretty!

I started by stamping 2 flakes and my sentiment with Versamark ink and embossed with clear embossing powder. Then I blended Tumbled Glass over the whole panel, revealing those two flakes and the sentiment in white. Once the panel was completely dry, I stamped 2 more flakes and embossed them. Then I blended Salty Ocean over the whole panel, revealing the 2 white flakes and 2 pale blue flakes. One more time, stamped and embossed and then blended with Chipped Sapphire ink, now revealing 3 different coloured snowflakes. You need patience for the dry time but it's important because you're laying up embossing powder, which will stick if there is any moisture on your panel.

Be sure to stop by the SugarPea blog for more details, inspiration and chances to win!

No automatic alt text available.


Tuesday 17 October 2017

SugarPea Designs Holiday Release Week Sweet Peeks Day 2


Welcome to Day 2 of SugarPea Designs' Holiday Release Week Sweet Peeks.


Today we have a set that really spoke to my accountant-heart - it's a grid to make a bar chart! YAY!

I stamped the chart in a pale grey so that the bars would pop in festive colours.


So after making my bar chart, I started thinking about how else to use these stamps. How about one of the bars as a base for your focal image? Or the grid as a background (think embossed in gold!!). Or colour in the squares to make a pixellated image? Fun! So even if you're not a chart-geek, there's lots of reasons to love this set!

No automatic alt text available.

Monday 16 October 2017

SugarPea Designs Holiday Release Week Sweet Peeks Day 1


Welcome to Day 1 of the SugarPea Designs Holiday Release Week Sweet Peeks! Oh, you're going to love this release - so many great stamp sets and dies!


Up first is Eskimo Kisses, a set of adorable critters all dressed up for winter. And we've got some new basic dies - Stitched Borders I.

I used the ZigZag Stitched Borders I to create some masks and blended ink for my ocean and the straight Border to edge my focal panel.  I stamped and coloured some icebergs - my little fishing penguin is towing along some gifts for his friends!

For this card, I just masked and masked! It's easy to cut multiple masks by stamping on top of a small stack (max 4) of sticky notes and then cut them all at once. Then stamping a scene like this goes very quickly. Colouring took a little while, but my limited colour scheme helped with that.

Be sure to check out the SugarPea blog for more details and chances to win!


No automatic alt text available.